This document shows how to run the watson-voice-bot server on your local machine.
- Clone the repo
- Create Watson services on IBM Cloud
- Upload the Watson Assistant workspace
- Configure
.envwith credentials - Run the application
Use the following command to clone the watson-voice-bot GitHub repository.
git clone https://github.com/IBM/watson-voice-botUse the following links to create the Watson services on IBM Cloud:
- Find the Assistant service in your IBM Cloud Dashboard
Services. - Click on your Watson Assistant service and then click on
Launch Watson Assistant. - Use the left sidebar and click on the
Skillsicon. - Click the
Create skillbutton. - Select the
Dialog skillcard and clickNext. - Select the
Import skilltab. - Click the
Choose JSON Filebutton and choose thedata/skill-insurance-voice-bot.jsonfile in your cloned watson-voice-bot repo. - Make sure the
Everythingbutton is enabled. - Click
Import. - Go back to the Skills page (use the left sidebar).
- Look for
insurance-voice-botcard. - Click on the three dots in the upper right-hand corner of the card and select
View API Details. - Copy the
Workspace IDGUID. Save it for the next step.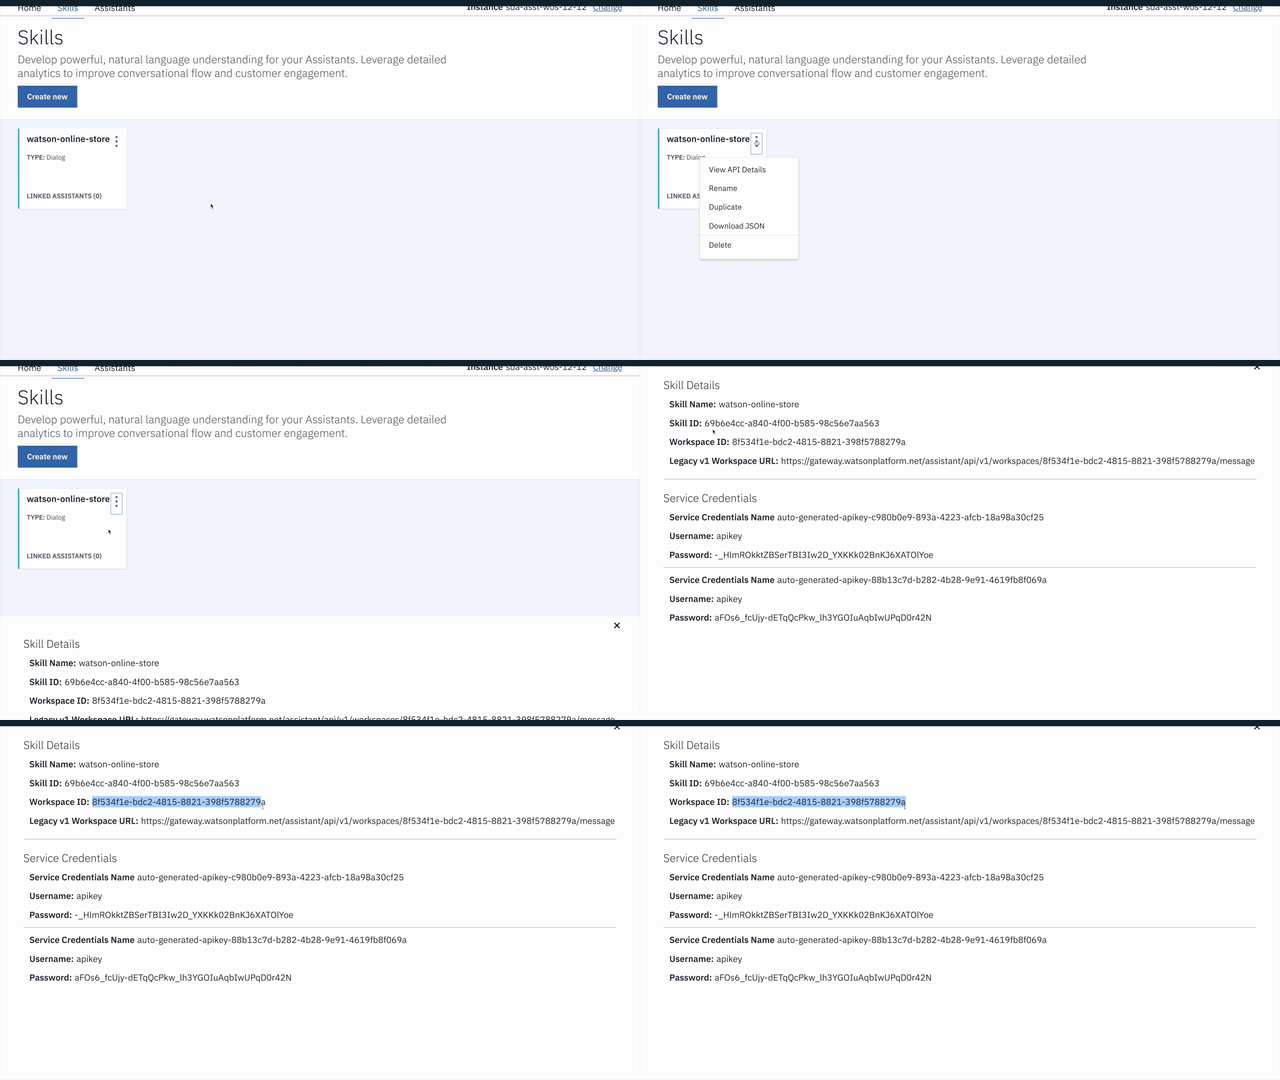
Our services are created and the workspace is uploaded. It's now time to let our application run locally and to do that we'll configure a simple text file with the environment variables we want to use. We begin by copying the sample.env file and naming it .env.
cp sample.env .envFirst, edit the .env file and set the WORKSPACE_ID to the value that was retrieved in the previous step.
Next, set the key-value pairs with credentials for each IBM Cloud service (Assistant, Speech to Text, and Text to Speech).
- Find each service in your IBM Cloud Dashboard
Services. - Click on a service to view its
Managepage. - Use the copy icon and copy/paste the
API KeyandURLinto your .env file for each service.
# Copy this file to .env before starting the app.
# Replace the credentials with your own.

# Watson Speech to Text
SPEECH_TO_TEXT_APIKEY=<add_speech-to-text_apikey>
SPEECH_TO_TEXT_URL=<add_speech-to-text_url>

# Watson Text to Speech
TEXT_TO_SPEECH_APIKEY=<add_text-to-speech_apikey>
TEXT_TO_SPEECH_URL=<add_text-to-speech_url>

# Watson Assistant
ASSISTANT_APIKEY=<add_assistant_apikey>
ASSISTANT_URL=<add_assistant_url>

# Optionally, use a non-default skill by specifying your own workspace ID or name.
# WORKSPACE_ID=<add_assistant_workspace_id>
# WORKSPACE_NAME=<add_assistant_workspace_name>-
The server requires Python 3.5 and above. It has been tested with Python 3.8.0.
-
The general recommendation for Python development is to use a virtual environment (venv). To install and initialize a virtual environment, use the
venvmodule on Python 3:
Create the virtual environment using Python. Use one of the two commands depending on your Python version.
Note:
pythonmay be namedpython3on your system.
python -m venv mytestenvNow source the virtual environment. Use one of the two commands depending on your OS.
source mytestenv/bin/activate  # Mac or Linux
./mytestenv/Scripts/activate   # Windows PowerShell
TIP 💡 To terminate the virtual environment use the
deactivatecommand.
- Start the app by running:
pip install -r requirements.txt
python app.py- Launch a browser and navigate to http://localhost:5000
- Click on the microphone icon to begin speaking and click it again when you are finished.